(1.) To make an image transparent: 10 marks.
(3.) To photoshop a castle in clouds: 10 marks.
(4.) To make a silhouette: 10 marks.
(5.) To add extra forms to a silhouette: 20 marks.
TOTAL: 50 marks.
Open the free software Gimp on your computer. This can take some time to open.
1.) Download a photo with your favourite actor, actress or insect. You must make the background transparent.
NOTICE: Only GIF-files can have a transparent background. Never save such a file as a JPG. Otherwise the file will lose it's transparency!
2.) Don't panic when you see all those panels from the GIMP for the first time. Keep breathing!
3.) Open your downloaded image in the GIMP.
4.) Click in the horizontal menu on LAAG ("layer")..
5.) Click on TRANSPARANTIE ("transparency") in the drop-down menu and click on Alphakanaal toevoegen. Everything which you erase in the image, will become transparent now.
6.) Look at the panel Gereedschapskist. Click on the pink eraser in Tool's Box and erase a part of the background. It will turn in a pattern of grey black little squares, which is the symbol for transparency in the GIMP.
7.) You can also select an area in your image and press DELETE which will make the selection transparent. Try out the next tools:
a.) Click in the Gereedschapskist / Tools' box on the first rectangle. Draw such a rectangle in your image and press DELETE.
b.) Click in the Gereedschapskist / Tools' box on the first ellipse. Draw a circle or ellipse in your image and press DELETE.
c.) Click in the Gereedschapskist / Tools's box on the lasso (the third symbol). You can select dots which the GIMP will connect with a line. Make sure that you click in the first dot when you end making your selection. Click on DELETE to see the effect.
GOLDEN TIP: If you have selected an area with the lasso, you can invert that selection by clicking in the horizontal menu on SELECTEREN ("select") and afterwards on INVERTEREN ("invert").
d.) Click in the Gereedschapskist / Tools's box on the magical wand. This tool will select everything with the same colour. Press delete to see the effect.
8.) Save your image as a GIF after you have chosen EXPORTEREN ("export").
9.) Put your GIF online on a webpage with a black background and show me the result.
Choose an image of a castle and of a cloud. Use the GIMP to create the illusion that the castle is floating in the clouds by merging the two photos.
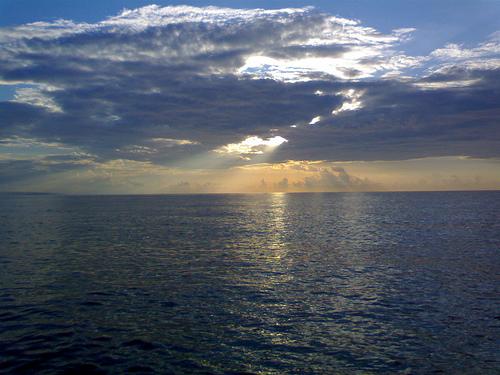
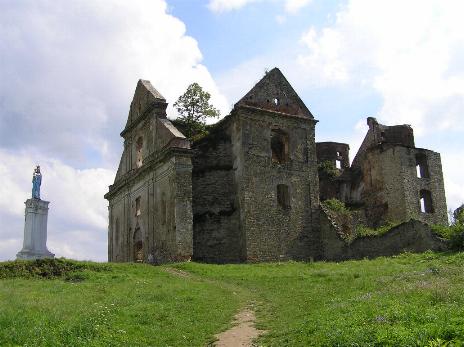
I'll use the next two images as to show how to do it but choose yourself images which are different.
Photo 01:
Photo 2:
Your intention is to make the castle float in the clouds.
Step 1: Open the Gimp and open the image of the clouds. Make sure that your image of the clouds is larger than the one of the castle.
Step 2: Open the photo of the castle in Gimp.
Step 3: Work in the image of the castle. Choose Selecteren ("select") in the menu and choose Alles ("everything").
Step 4: Click on Kopiëren ("copy") which you can find in the horizontal menu under Bewerken ("edit")..
Step 5: Go to the image of the clouds and click on Plakken als een nieuwe laag ("pasting as a new layer") which you can find under Bewerken ("edit") in the horizontal menu.
Step 6: Click on the 12th symbol in the the panel called Gereedschapskist / Tool Box. It looks like a cross with arrowss. Now you can drag with your mouse the castle to the right position in the photo of the clouds. If your image would be too small or too big, go to Laag ("layer") in the horizontal menu and choose Laag schalen ("change the size of the layer").
Step 7: Go to the panel Lagen, Kanalen, Pen ("layers, channels, pen") and put the small thumbnail photo of the clouds (drag it with the mouse) under the photo of the thumbnail(s) of the cloud photo. .
Step 7: Click on the right button of your mouse while you are there on the small thumbnail phooto of the castle and choose Laagmasker toevoegen ("add layer-mask).
Step 8: The panel “Masker aan de laag toevoegen” ("adding mask to the layer") will appear. Select Wit (ondoorzichtig) ("White opacity").
Step 9: Click on the 24th symbol in the the panel called Gereedschapskist / Tool Box. It looks like a brush. You can also change the size of the brush. If you colour the background of the photo of the castle, this background will become transparent.
TIP: Click on the Lasso symbol in the panel called Gereedschapskist / Tool Box and encircle with dots the castle in the image. Make sure that you click in the first dot that you made as to connect the last dot with it. The whole castle will be selected then. Then go to Selecteren ("select") in the horizontal menu and choose Inverteren ("invert"). Doing so you have selected the area outside the castle.If you colour now, you can't colour the castle which is now protected by your selection.
Step 10: If you have deleted too much, you can restore this by colouring it with a brush which gives a white colour. It is the right moment to put your brush to a small size.
Step 11: First save your project by clicking on Bestand in the horizontal menu and then on Opslaan. Then choose Exporteren (also in the Bestand drop-down box). Save the file as a jpg and show me the result.
1. Download http://www.projectx2002.org/beeld/sil01.jpg. Use the techniques which you have learnt up to now to make the figure of the girl completely black and to make the background white. Doing so the girl with the guitar will become a silhouette. Show me the result.
2. Download http://www.projectx2002.org/beeld/sil02.jpg. Choose to matching colours. Give the darker colour to the silhouette of the girl and the lighter colour to the background.
Finish the assignment now:
- Make the hand and the boy disappear who was holding the guitar in the air.
- Give her better wings! Use an image of wings from the internet to get this job done.
- Give her a halo.
Use the technique of Making silhouettes to make a logo for your site.
This is important for a logo:
1.) Mention a name for your site in your logo.
2.) Don't use more than four matching colours. Two is even stronger.
3.) Make sure that the logo reflects the subject.
4.) Work with silhouettes and leave away all details.
Last update 14.02.2014